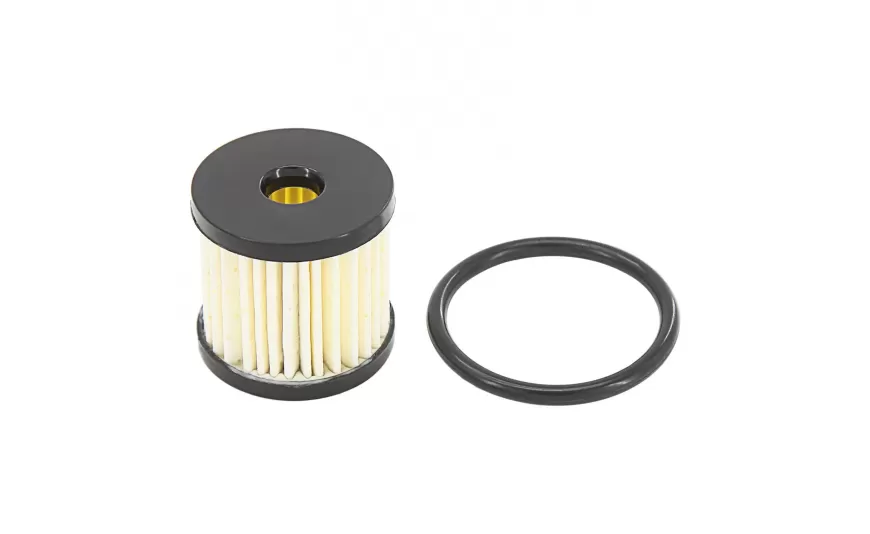
Maintaining the fuel filter is essential to ensure the overall health and efficiency of the engine. The fuel filter is like a filter that removes impurities and contaminants from the fuel, ensuring that the fuel in the engine is clean and uncontaminated, thereby protecting the fuel injection system (such as injectors, high pressure fuel pumps, etc.)and optimizing engine performance.
However, if the filter is not cleaned for a long time, the filter will become clogged. Fuel filter clogging is a common problem in the fuel system. The root cause is the accumulation of contaminants in the fuel, which leads to a decrease in the filtering capacity of the filter element. This makes car owners consider the problem of fuel filter clogging. Can the fuel filter be replaced? Can the fuel filter be replaced? How to replace the fuel filter has become a problem that troubles car owners. Next, we begin to explore these issues step by step.
Location of the fuel filter
To better maintain the fuel filter, you must first know the location of the fuel filter. Fuel filters usually have the following installation locations:
External fuel filters are generally installed in the fuel line of the vehicle chassis, commonly found outside the fuel tank, and connected to the return pipe.
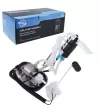
Internal fuel filters are installed inside the fuel tank and integrated with the fuel pump.
Search method
According to the fuel supply line of the injector, search upstream until the fuel tank. If you see the filter on the fuel supply line, it is an external type; if you don't see it, it is usually built into the fuel tank.
Fuel filter removal steps
To remove the fuel filter, you must first prepare, park the vehicle on a solid and flat ground, and then turn off the engine. Remove the key to disconnect the negative pole of the power supply to prevent accidental starting and electric sparks. Prepare new fuel filter, oil container, rag, sealant, oil pipe clamp, wrench, screwdriver and other tools.
External filter
Disconnect the oil pipe: Use pliers to loosen or remove the oil pipe clamp. Gently pull out the oil pipe and use the oil container to catch the flowing fuel. Note the marking of the oil inlet and outlet positions.
Remove the fixing bolts or clips: Use a wrench or screwdriver to remove the bolts that fix the filter or loosen the clips. Remove the old filter from the mounting bracket.
Built-in filter
Remove the fuel tank cover and related parts: Remove the rear seats and fuel tank cover, and clean up dust and debris. Disconnect the electrical connection of the fuel pump and the oil pipe connection.
Remove the fuel pump assembly: Some models need to remove the entire fuel tank, or use special tools to remove the fuel pump assembly from the fuel tank.
Remove the filter: Remove the old filter from the fuel pump assembly, pay attention to the connection method, and special tools may be required.
Cleaning and inspection
Clean the interface: Wipe the interface between the fuel line and the filter installation position with a cotton cloth to ensure that there is no dirt left.
Check the seal: Check whether the seal of the new filter is intact. If it is damaged, it needs to be replaced.
Always pay attention to safety during operation. Stay away from open flames and high-temperature objects to prevent fire. Wear protective gloves and glasses to avoid fuel contact with skin and eyes. Be careful not to let dirt enter the fuel line during disassembly. When installing a new filter, pay attention to the direction of the arrow to ensure that the fuel flows in the correct direction.
Fuel filter cleaning steps
The main function of the fuel filter is to filter impurities in the fuel. It is usually not recommended to clean it, but to replace it directly. Due to the material limitations of the filter element, most fuel filters use paper, fiber or metal filters. Cleaning may damage the filter material and reduce the filtering effect; safety risks, fuel is volatile, and self-disassembly and cleaning may cause leakage or fire hazards; economic replacement costs are usually not high, cleaning is time-consuming and the effect is limited.
But if it is a metal mesh fuel filter (more common in old models or motorcycles) and the filter element structure is removable, you can try the following cleaning steps:
Tools required for cleaning metal mesh fuel filters: gloves, goggles (to prevent fuel splashing), open-end wrench or special tools (to remove the filter), carburetor cleaner or diesel, soft brush/air gun, clean container (to receive residual fuel).
Operation process
1. Safety preparation: Turn off the vehicle and disconnect the negative pole of the battery (to avoid static sparks). Operate in a ventilated place and away from open flames.
2. Release fuel pressure (necessary for electronic fuel injection models): Find the fuel pump relay or fuse, start the engine until it turns off (pressure relief). Or wrap the joint with cloth before removing the filter and slowly loosen the oil pipe.
3. Remove the filter: Use tools to loosen the oil pipe clamps at both ends of the filter (pay attention to fuel residue). Remove the filter and put it in a container to prevent fuel leakage.
4. Clean the filter element: Soak the filter in carburetor cleaner or diesel for 10-15 minutes to soften the sediment. Use a soft brush to gently brush the surface of the filter (do not use force to avoid deformation). Use an air gun to blow away impurities from the inside out (if there is no air gun, you can rinse it with clean water, but it needs to be thoroughly dried).
5. Inspection and installation: Check the filter against the light to see if it is transparent, without damage or deformation. Reinstall the filter in the original direction and ensure that the oil pipe joint is tight (to avoid oil leakage).
6. Test: Connect the battery back, start the engine, and check whether the filter and interface are leaking.
Notes
1. Paper/disposable filters cannot be cleaned: forced cleaning will cause the fiber structure to be damaged and the filtration to fail.
2. Be careful when cleaning the diesel filter: the water separation function may fail due to cleaning, so it is recommended to replace it directly.
3. Performance degradation after cleaning: even for metal filters, repeated cleaning will affect the filtration accuracy, so it is recommended to replace it first.
The fuel filter must be replaced if the following conditions occur: the filter element is black, deformed or damaged. The engine fails due to insufficient fuel supply (the problem is not solved after cleaning). The vehicle maintenance manual clearly requires replacement (such as every 20,000 kilometers).
Recommendation: For modern electronic injection/direct injection models, the fuel system has high pressure and strict precision requirements. Be sure to use a new filter to avoid damaging the injector or high-pressure pump due to small losses.
Summary
Keeping the fuel filter in good condition is the key to maintaining a reliable and efficient engine. Regularly checking, cleaning and replacing the fuel filter when necessary can ensure that clean fuel enters the engine, which directly affects the engine's performance, fuel economy and overall service life.
The above is a sharing about fuel filters. If you are not clear about the above sharing, please contact us. OSIAS has a professional technical team to answer your questions wholeheartedly.


Write a comment